What one-click install creates
The default environment install can create:Prerequisites
- Console is deployed in Kubernetes with the starter RBAC or equivalent permissions.
- The Kubernetes cluster has a default StorageClass, or you know which StorageClass to use.
- The cluster has enough CPU and memory for the selected components.
- For air-gapped installs, the private Docker registry and required Helm charts are prepared before installation.
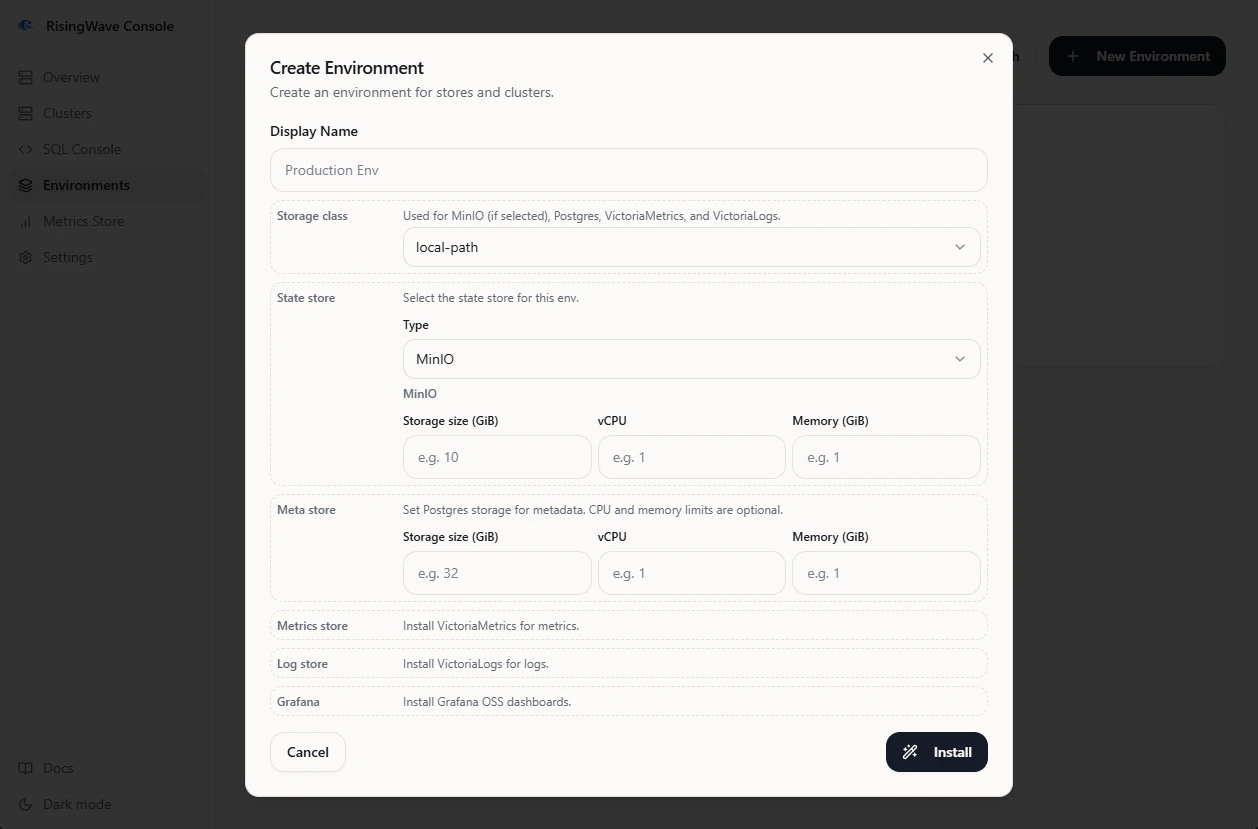
Create an environment
- Open Environments from the sidebar.
- Click Create Environment.
- Enter a display name.
- Set Storage class if you do not want to use the cluster default.
- Select the components to install. The default selection installs the complete stack.
- Click Install.
Track install progress
On the environment detail page:- Status shows each component state, such as pending, installing, ready, or failed.
- Logs shows installation logs from the underlying tasks.
- Acceptance Test runs a smoke check after the components are ready.
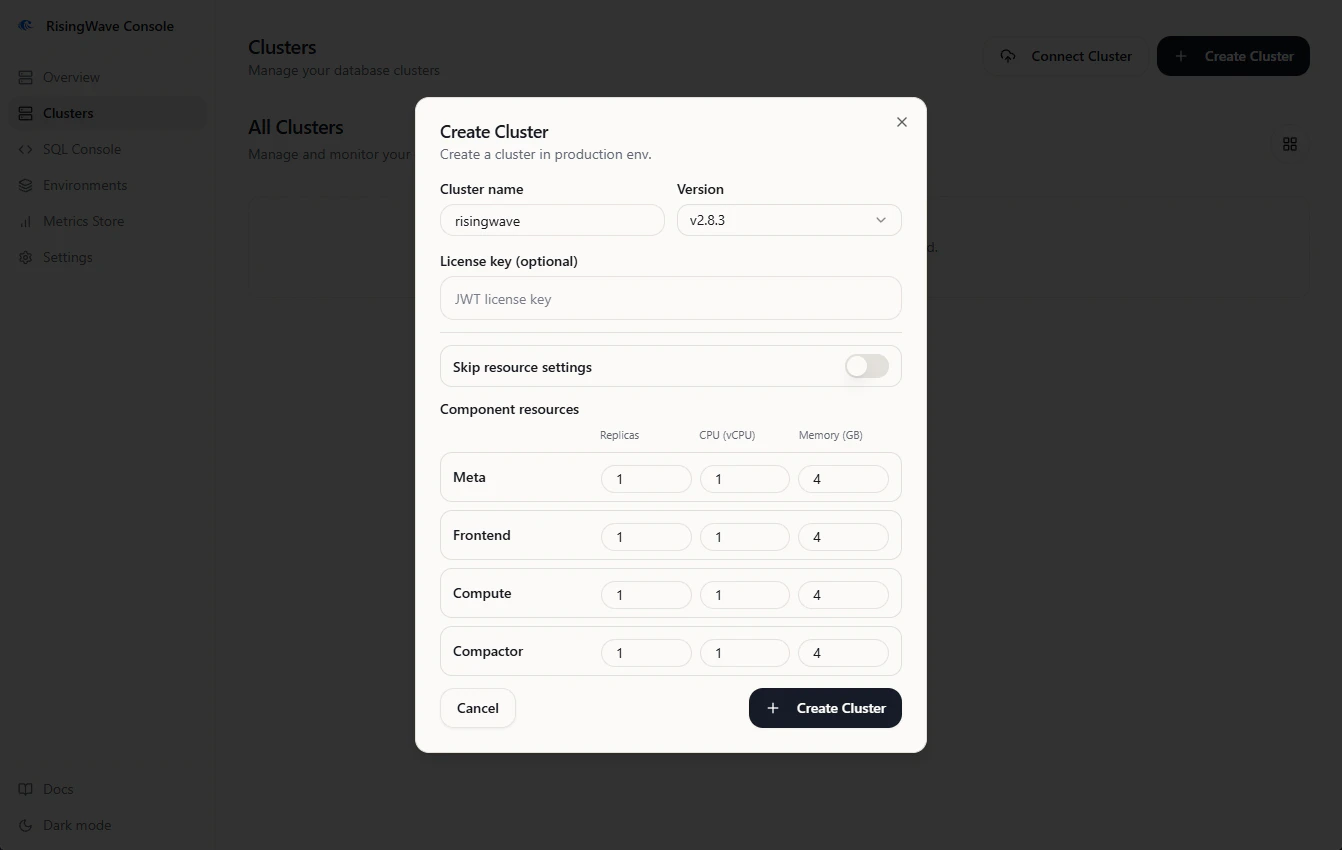
Create a managed cluster
After an environment is ready:- Open Clusters and click Create Cluster, or use the create-cluster action from the environment detail page.
- Select the environment.
- Enter the cluster name.
- Select the RisingWave version.
- Optionally paste a RisingWave database license key.
- Review or adjust component resource settings.
- Click Create.
risectl, metadata snapshots, diagnostics, and metrics.
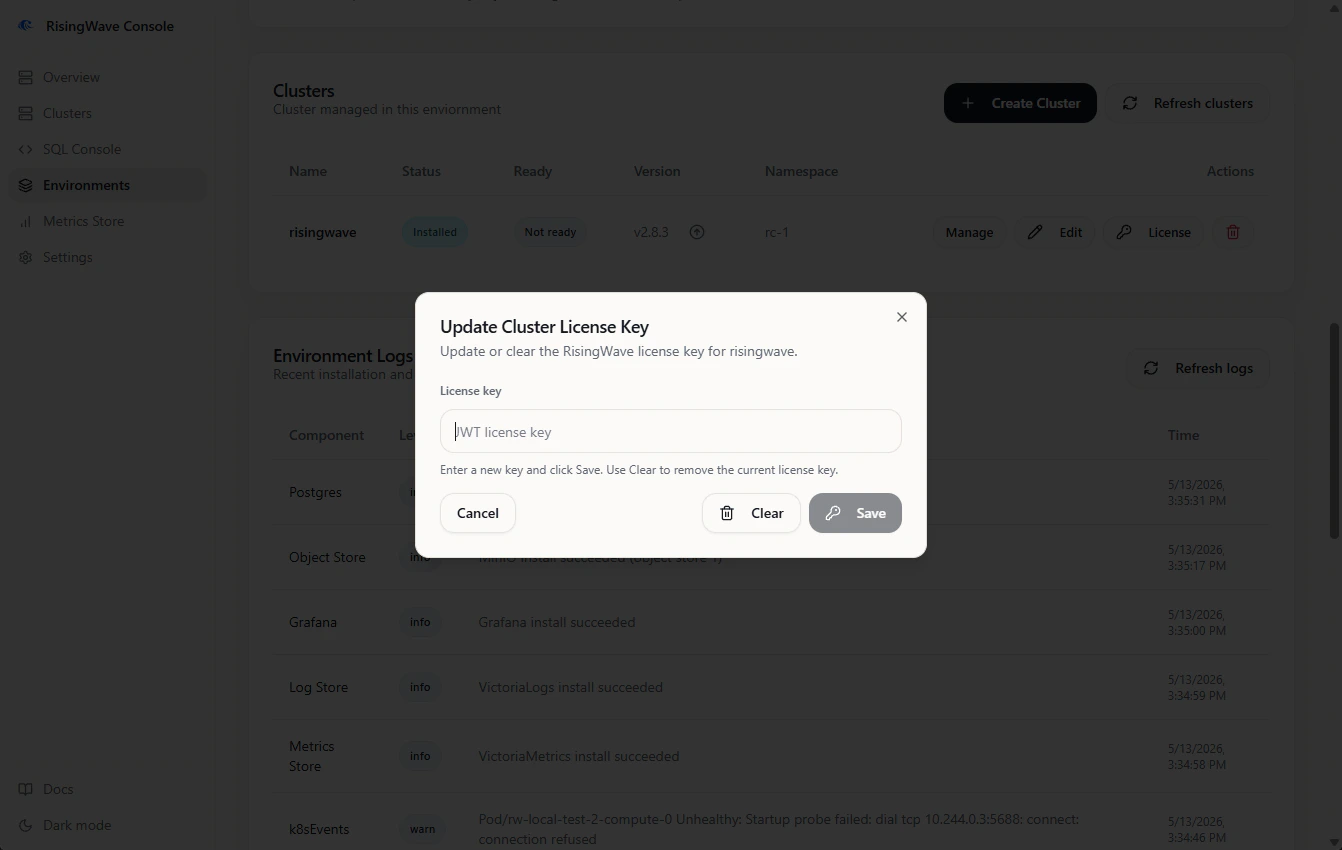
Update managed clusters
From the environment detail page, you can manage cluster operations such as:- update component resource settings,
- update the RisingWave image tag,
- update or clear the RisingWave database license key,
- delete the managed cluster.