RW_LICENSE_KEY or RW_LICENSE_KEY_PATH. If you only want to try Console without configuring a license key, use v0.5.1; it is an older evaluation version and does not include all current capabilities. For details, see Manage license keys.
Choose a deployment target
| Target | Metadata PostgreSQL | Best for |
|---|---|---|
Docker with -pgbundle image | PostgreSQL runs inside the Console container | Local evaluation, demos, or a single VM |
| Docker or binary with external PostgreSQL | You provide PostgreSQL | Persistent single-host deployments |
Kubernetes with -pgbundle manifest | PostgreSQL runs inside the Console pod | Small, self-contained Kubernetes tests |
| Kubernetes with external PostgreSQL manifest | You provide PostgreSQL | Production, OpenShift, and restricted clusters |
For persistent deployments, use a strong
RCONSOLE_ROOT_PASSWORD, protect the
Console endpoint with your network controls, and prefer external PostgreSQL
for durable Console metadata.Key configuration
| Setting | Required | Description |
|---|---|---|
RW_LICENSE_KEY | Yes, unless RW_LICENSE_KEY_PATH is set | Signed RisingWave license key used for Console startup verification. |
RW_LICENSE_KEY_PATH | Yes, unless RW_LICENSE_KEY is set | Path to a mounted file containing the signed license key. Recommended for Docker and Kubernetes. |
RCONSOLE_ROOT_PASSWORD | Recommended | Initial password for the root user. If unset, the default password is root. |
RCONSOLE_SERVER_PG_DSN | Required for non-pgbundle deployments | PostgreSQL DSN for Console metadata, for example postgres://user:password@postgres.example:5432/rconsole. |
RCONSOLE_SERVER_PORT | Optional | HTTP port for Console. The default is 8020. |
RCONSOLE_SERVER_METRICSPORT | Optional | Prometheus metrics port for Console itself. The default is 9020. |
RCONSOLE_NOINTERNET | Optional | Set to true when Console should not download risectl or Helm charts from the public internet. |
RCONSOLE_RISECTLDIR | Optional | Directory where Console stores or reads risectl binaries. |
RCONSOLE_HELM_CHART_DIR | Optional | Directory where Console stores or reads Helm chart archives for air-gapped installs. |
Docker quick start
Use the bundled PostgreSQL image for the fastest setup:export RW_LICENSE_KEY="<your-signed-license-token>"
docker run -d -p 8020:8020 --name risingwave-console \
-e RCONSOLE_ROOT_PASSWORD=your_secure_password \
-e RW_LICENSE_KEY="$RW_LICENSE_KEY" \
-v risingwave-console-data:/var/lib/postgresql \
risingwavelabs/risingwave-console:latest-pgbundle
http://localhost:8020 and sign in as root with the password you set in RCONSOLE_ROOT_PASSWORD.
If you prefer mounted files for secrets:
docker run -d -p 8020:8020 --name risingwave-console \
  -e RCONSOLE_ROOT_PASSWORD=your_secure_password \
  -e RW_LICENSE_KEY_PATH=/etc/rconsole/license.jwt \
  -v "$PWD/license.jwt:/etc/rconsole/license.jwt:ro" \
  -v risingwave-console-data:/var/lib/postgresql \
  risingwavelabs/risingwave-console:latest-pgbundle
--rm. Console metadata is deleted when the container is removed.
Docker with external PostgreSQL
Use the standard image when PostgreSQL is managed outside the Console container:services:
risingwave-console:
image: risingwavelabs/risingwave-console:latest
ports:
- "8020:8020"
environment:
RCONSOLE_ROOT_PASSWORD: your_secure_password
RCONSOLE_SERVER_PG_DSN: postgres://rconsole_user:rconsole_password@postgres:5432/rconsole
RW_LICENSE_KEY_PATH: /etc/rconsole/license.jwt
volumes:
- ./license.jwt:/etc/rconsole/license.jwt:ro
docker compose up -d
RCONSOLE_SERVER_PG_DSN must be able to create and migrate Console metadata tables.
Kubernetes deployment
Console provides two starter manifests. Choose one based on where its PostgreSQL metadata lives, edit the placeholder secrets, then apply it. Each manifest is self-contained — copy it into a file and apply it withkubectl.
| Manifest | Image tag | Metadata PostgreSQL | Best for |
|---|---|---|---|
Bundled PostgreSQL (pgbundle) | v0.7.4-pgbundle | Runs inside the Console pod | Small, self-contained Kubernetes tests |
| External PostgreSQL | v0.7.4 | You provide a PostgreSQL DSN | Production, OpenShift, and restricted clusters |
The bundled PostgreSQL metadata is not durable across pod rescheduling. Use
the external PostgreSQL manifest for production.
risingwave-console namespace, a ServiceAccount, RBAC for Console operations and environment-managed resources, a StatefulSet, and a Service that exposes Console on NodePort 30020 (UI) and 30090 (metrics).
Option A — bundled PostgreSQL
Save the following asrisingwave-console-pgbundle.yaml, replace <your-signed-license-token> in the risingwave-console-license Secret with your signed RisingWave license key, then apply it.
risingwave-console-pgbundle.yaml
risingwave-console-pgbundle.yaml
risingwave-console-pgbundle.yaml
apiVersion: v1
kind: Namespace
metadata:
  name: risingwave-console
---
apiVersion: v1
kind: ServiceAccount
metadata:
  name: risingwave-console
  namespace: risingwave-console
---
apiVersion: v1
kind: Secret
metadata:
  name: risingwave-console-license
  namespace: risingwave-console
type: Opaque
stringData:
  # Replace with your signed enterprise license token.
  license.jwt: <your-signed-license-token>
---
apiVersion: rbac.authorization.k8s.io/v1
kind: ClusterRole
metadata:
  name: risingwave-console-ops
  labels:
    app.kubernetes.io/name: risingwave-console
    rconsole.risingwave.com/rbac-profile: ops
    rconsole.risingwave.com/aggregate-to-seed: "true"
rules:
  - apiGroups: [""]
    resources:
      - namespaces
    verbs: ["get", "list", "watch", "create", "update", "patch"]
  - apiGroups: ["rbac.authorization.k8s.io"]
    resources:
      - rolebindings
    verbs: ["get", "list", "watch", "create", "update", "patch", "delete"]
  - apiGroups: ["rbac.authorization.k8s.io"]
    resources:
      - clusterroles
    resourceNames:
      - risingwave-console-env-scoped
    verbs: ["bind"]
  - apiGroups: ["storage.k8s.io"]
    resources:
      - storageclasses
    verbs: ["get", "list", "watch"]
---
apiVersion: rbac.authorization.k8s.io/v1
kind: ClusterRole
metadata:
  name: risingwave-console-env-scoped
  labels:
    app.kubernetes.io/name: risingwave-console
    rconsole.risingwave.com/rbac-profile: env-scoped
rules:
  - apiGroups: [""]
    resources:
      - pods
      - services
      - endpoints
      - events
      - configmaps
      - secrets
      - serviceaccounts
      - persistentvolumeclaims
    verbs: ["get", "list", "watch", "create", "update", "patch", "delete"]
  - apiGroups: [""]
    resources:
      - services/proxy
    verbs: ["get"]
  - apiGroups: [""]
    resources:
      - pods/exec
    verbs: ["create"]
  - apiGroups: [""]
    resources:
      - pods/log
    verbs: ["get"]
  - apiGroups: ["apps"]
    resources:
      - deployments
      - statefulsets
      - replicasets
    verbs: ["get", "list", "watch", "create", "update", "patch", "delete"]
  - apiGroups: ["rbac.authorization.k8s.io"]
    resources:
      - roles
      - rolebindings
    verbs: ["get", "list", "watch", "create", "update", "patch", "delete"]
  - apiGroups: ["risingwave.risingwavelabs.com"]
    resources:
      - risingwaves
      - risingwaves/status
    verbs: ["get", "list", "watch", "create", "update", "patch", "delete"]
---
apiVersion: rbac.authorization.k8s.io/v1
kind: ClusterRole
metadata:
  name: risingwave-console-namespace-deleter-allowlist
  labels:
    app.kubernetes.io/name: risingwave-console
    rconsole.risingwave.com/rbac-profile: namespace-deleter
    rconsole.risingwave.com/aggregate-to-seed: "true"
rules:
  - apiGroups: [""]
    resources:
      - namespaces
    verbs: ["get", "delete"]
    resourceNames:
      - __rconsole_placeholder__
---
apiVersion: rbac.authorization.k8s.io/v1
kind: ClusterRole
metadata:
  name: risingwave-console-namespace-deleter-editor
  labels:
    app.kubernetes.io/name: risingwave-console
    rconsole.risingwave.com/rbac-profile: namespace-deleter
    rconsole.risingwave.com/aggregate-to-seed: "true"
rules:
  - apiGroups: ["rbac.authorization.k8s.io"]
    resources:
      - clusterroles
    verbs: ["get", "patch", "update", "escalate"]
    resourceNames:
      - risingwave-console-namespace-deleter-allowlist
---
apiVersion: rbac.authorization.k8s.io/v1
kind: ClusterRole
metadata:
  name: risingwave-console-seed
  labels:
    app.kubernetes.io/name: risingwave-console
aggregationRule:
  clusterRoleSelectors:
    - matchLabels:
        rconsole.risingwave.com/aggregate-to-seed: "true"
rules: []
---
apiVersion: rbac.authorization.k8s.io/v1
kind: ClusterRoleBinding
metadata:
  name: risingwave-console-seed
  labels:
    app.kubernetes.io/name: risingwave-console
subjects:
  - kind: ServiceAccount
    name: risingwave-console
    namespace: risingwave-console
roleRef:
  kind: ClusterRole
  name: risingwave-console-seed
  apiGroup: rbac.authorization.k8s.io
---
apiVersion: apps/v1
kind: StatefulSet
metadata:
  name: risingwave-console
  namespace: risingwave-console
spec:
  replicas: 1
  selector:
    matchLabels:
      app: risingwave-console
  serviceName: risingwave-console
  template:
    metadata:
      labels:
        app: risingwave-console
    spec:
      serviceAccountName: risingwave-console
      containers:
        - name: console
          image: risingwavelabs/risingwave-console:v0.7.4-pgbundle
          imagePullPolicy: IfNotPresent
          ports:
            - name: http
              containerPort: 8020
            - name: metrics
              containerPort: 9020
          env:
            - name: RW_LICENSE_KEY
              valueFrom:
                secretKeyRef:
                  name: risingwave-console-license
                  key: license.jwt
            - name: RCONSOLE_SERVER_PORT
              value: "8020"
            - name: RCONSOLE_SERVER_METRICSPORT
              value: "9020"
          volumeMounts:
            - name: risingwave-console-data
              mountPath: /risingwave-console-data
  volumeClaimTemplates:
    - metadata:
        name: risingwave-console-data
      spec:
        accessModes:
          - ReadWriteOnce
        # storageClassName: standard  # Replace with your cluster's StorageClass
        resources:
          requests:
            storage: 20Gi
---
apiVersion: v1
kind: Service
metadata:
  name: risingwave-console-nodeport
  namespace: risingwave-console
spec:
  type: NodePort
  ports:
    - name: risingwave-console
      port: 8020
      targetPort: 8020
      nodePort: 30020
    - name: risingwave-console-metric
      port: 9020
      targetPort: 9020
      nodePort: 30090
  selector:
    app: risingwave-console
---
#############################################################
##
## The following part is needed to install Cert Manager and
## RisingWave Operator. If you already have them installed,
## you can skip applying the following RBAC resources.
##
#############################################################
apiVersion: rbac.authorization.k8s.io/v1
kind: ClusterRole
metadata:
  name: risingwave-console-cluster-installer
  labels:
    app.kubernetes.io/name: risingwave-console
    rconsole.risingwave.com/rbac-profile: cluster-installer
rules:
  - apiGroups: ["apiextensions.k8s.io"]
    resources:
      - customresourcedefinitions
    verbs: ["get", "list", "watch", "create", "update", "patch", "delete"]
  - apiGroups: ["rbac.authorization.k8s.io"]
    resources:
      - clusterroles
    verbs:
      [
        "get",
        "list",
        "watch",
        "create",
        "update",
        "patch",
        "delete",
        "bind",
        "escalate",
      ]
  - apiGroups: ["rbac.authorization.k8s.io"]
    resources:
      - clusterrolebindings
    verbs: ["get", "list", "watch", "create", "update", "patch", "delete"]
  - apiGroups: ["admissionregistration.k8s.io"]
    resources:
      - mutatingwebhookconfigurations
      - validatingwebhookconfigurations
    verbs: ["get", "list", "watch", "create", "update", "patch", "delete"]
  - apiGroups: ["apiregistration.k8s.io"]
    resources:
      - apiservices
    verbs: ["get", "list", "watch", "create", "update", "patch", "delete"]
  - apiGroups: [""]
    resources:
      - namespaces
    verbs: ["get", "list", "watch", "create", "update", "patch"]
  - apiGroups: [""]
    resources:
      - pods
      - services
      - endpoints
      - configmaps
      - secrets
      - serviceaccounts
      - events
    verbs: ["get", "list", "watch", "create", "update", "patch", "delete"]
  - apiGroups: [""]
    resources:
      - serviceaccounts/token
    verbs: ["create"]
  - apiGroups: ["coordination.k8s.io"]
    resources:
      - leases
    verbs: ["get", "list", "watch", "create", "update", "patch", "delete"]
  - apiGroups: ["apps"]
    resources:
      - deployments
      - replicasets
      - statefulsets
    verbs: ["get", "list", "watch", "create", "update", "patch", "delete"]
  - apiGroups: ["rbac.authorization.k8s.io"]
    resources:
      - roles
      - rolebindings
    verbs: ["get", "list", "watch", "create", "update", "patch", "delete"]
  - apiGroups: ["batch"]
    resources:
      - jobs
    verbs: ["get", "list", "watch", "create", "update", "patch", "delete"]
  - apiGroups: ["cert-manager.io"]
    resources:
      - certificates
      - certificaterequests
      - issuers
      - clusterissuers
    verbs: ["get", "list", "watch", "create", "update", "patch", "delete"]
  - apiGroups: ["networking.k8s.io"]
    resources:
      - networkpolicies
    verbs: ["get", "list", "watch", "create", "update", "patch", "delete"]
  - apiGroups: ["policy"]
    resources:
      - poddisruptionbudgets
    verbs: ["get", "list", "watch", "create", "update", "patch", "delete"]
  - apiGroups: ["monitoring.coreos.com"]
    resources:
      - podmonitors
      - servicemonitors
    verbs: ["get", "list", "watch", "create", "update", "patch", "delete"]
---
apiVersion: rbac.authorization.k8s.io/v1
kind: ClusterRoleBinding
metadata:
  name: risingwave-console-cluster-installer
  labels:
    app.kubernetes.io/name: risingwave-console
subjects:
  - kind: ServiceAccount
    name: risingwave-console
    namespace: risingwave-console
roleRef:
  kind: ClusterRole
  name: risingwave-console-cluster-installer
  apiGroup: rbac.authorization.k8s.io
kubectl apply -f risingwave-console-pgbundle.yaml
Option B — external PostgreSQL
Save the following asrisingwave-console-external-pg.yaml. Before applying, edit the risingwave-console-config Secret: set pg-dsn to your PostgreSQL connection string, root-password to the initial password for the root user, and license.jwt to your signed license token. The PostgreSQL user in pg-dsn must be able to create and migrate Console metadata tables. This is the production path and also works with OpenShift restricted security settings.
risingwave-console-external-pg.yaml
risingwave-console-external-pg.yaml
risingwave-console-external-pg.yaml
apiVersion: v1
kind: Namespace
metadata:
  name: risingwave-console
---
apiVersion: v1
kind: ServiceAccount
metadata:
  name: risingwave-console
  namespace: risingwave-console
---
apiVersion: rbac.authorization.k8s.io/v1
kind: ClusterRole
metadata:
  name: risingwave-console-ops
  labels:
    app.kubernetes.io/name: risingwave-console
    rconsole.risingwave.com/rbac-profile: ops
    rconsole.risingwave.com/aggregate-to-seed: "true"
rules:
  - apiGroups: [""]
    resources:
      - namespaces
    verbs: ["get", "list", "watch", "create", "update", "patch"]
  - apiGroups: ["rbac.authorization.k8s.io"]
    resources:
      - rolebindings
    verbs: ["get", "list", "watch", "create", "update", "patch", "delete"]
  - apiGroups: ["rbac.authorization.k8s.io"]
    resources:
      - clusterroles
    resourceNames:
      - risingwave-console-env-scoped
    verbs: ["bind"]
  - apiGroups: ["storage.k8s.io"]
    resources:
      - storageclasses
    verbs: ["get", "list", "watch"]
---
apiVersion: rbac.authorization.k8s.io/v1
kind: ClusterRole
metadata:
  name: risingwave-console-env-scoped
  labels:
    app.kubernetes.io/name: risingwave-console
    rconsole.risingwave.com/rbac-profile: env-scoped
rules:
  - apiGroups: [""]
    resources:
      - pods
      - services
      - endpoints
      - events
      - configmaps
      - secrets
      - serviceaccounts
      - persistentvolumeclaims
    verbs: ["get", "list", "watch", "create", "update", "patch", "delete"]
  - apiGroups: [""]
    resources:
      - services/proxy
    verbs: ["get"]
  - apiGroups: [""]
    resources:
      - pods/exec
    verbs: ["create"]
  - apiGroups: [""]
    resources:
      - pods/log
    verbs: ["get"]
  - apiGroups: ["apps"]
    resources:
      - deployments
      - statefulsets
      - replicasets
    verbs: ["get", "list", "watch", "create", "update", "patch", "delete"]
  - apiGroups: ["rbac.authorization.k8s.io"]
    resources:
      - roles
      - rolebindings
    verbs: ["get", "list", "watch", "create", "update", "patch", "delete"]
  - apiGroups: ["risingwave.risingwavelabs.com"]
    resources:
      - risingwaves
      - risingwaves/status
    verbs: ["get", "list", "watch", "create", "update", "patch", "delete"]
---
apiVersion: rbac.authorization.k8s.io/v1
kind: ClusterRole
metadata:
  name: risingwave-console-namespace-deleter-allowlist
  labels:
    app.kubernetes.io/name: risingwave-console
    rconsole.risingwave.com/rbac-profile: namespace-deleter
    rconsole.risingwave.com/aggregate-to-seed: "true"
rules:
  - apiGroups: [""]
    resources:
      - namespaces
    verbs: ["get", "delete"]
    resourceNames:
      - __rconsole_placeholder__
---
apiVersion: rbac.authorization.k8s.io/v1
kind: ClusterRole
metadata:
  name: risingwave-console-namespace-deleter-editor
  labels:
    app.kubernetes.io/name: risingwave-console
    rconsole.risingwave.com/rbac-profile: namespace-deleter
    rconsole.risingwave.com/aggregate-to-seed: "true"
rules:
  - apiGroups: ["rbac.authorization.k8s.io"]
    resources:
      - clusterroles
    verbs: ["get", "patch", "update", "escalate"]
    resourceNames:
      - risingwave-console-namespace-deleter-allowlist
---
apiVersion: rbac.authorization.k8s.io/v1
kind: ClusterRole
metadata:
  name: risingwave-console-seed
  labels:
    app.kubernetes.io/name: risingwave-console
aggregationRule:
  clusterRoleSelectors:
    - matchLabels:
        rconsole.risingwave.com/aggregate-to-seed: "true"
rules: []
---
apiVersion: rbac.authorization.k8s.io/v1
kind: ClusterRoleBinding
metadata:
  name: risingwave-console-seed
  labels:
    app.kubernetes.io/name: risingwave-console
subjects:
  - kind: ServiceAccount
    name: risingwave-console
    namespace: risingwave-console
roleRef:
  kind: ClusterRole
  name: risingwave-console-seed
  apiGroup: rbac.authorization.k8s.io
---
apiVersion: v1
kind: Secret
metadata:
  name: risingwave-console-config
  namespace: risingwave-console
type: Opaque
stringData:
  # OpenShift restricted-v2 requires the non-pgbundle image, so point Console
  # at an external PostgreSQL metastore.
  pg-dsn: postgres://postgres:change-me@postgres.example.svc:5432/postgres
  root-password: change-me
  # Required for startup license verification.
  license.jwt: <your-signed-license-token>
---
apiVersion: apps/v1
kind: StatefulSet
metadata:
  name: risingwave-console
  namespace: risingwave-console
spec:
  replicas: 1
  selector:
    matchLabels:
      app: risingwave-console
  serviceName: risingwave-console
  template:
    metadata:
      labels:
        app: risingwave-console
    spec:
      serviceAccountName: risingwave-console
      securityContext:
        runAsNonRoot: true
        seccompProfile:
          type: RuntimeDefault
      containers:
        - name: console
          image: risingwavelabs/risingwave-console:v0.7.4
          imagePullPolicy: IfNotPresent
          securityContext:
            allowPrivilegeEscalation: false
            capabilities:
              drop:
                - ALL
          ports:
            - name: http
              containerPort: 8020
            - name: metrics
              containerPort: 9020
          env:
            - name: RW_LICENSE_KEY
              valueFrom:
                secretKeyRef:
                  name: risingwave-console-config
                  key: license.jwt
            - name: RCONSOLE_ROOT_PASSWORD
              valueFrom:
                secretKeyRef:
                  name: risingwave-console-config
                  key: root-password
            - name: RCONSOLE_SERVER_PG_DSN
              valueFrom:
                secretKeyRef:
                  name: risingwave-console-config
                  key: pg-dsn
            - name: RCONSOLE_SERVER_PORT
              value: "8020"
            - name: RCONSOLE_SERVER_METRICSPORT
              value: "9020"
            - name: RCONSOLE_RISECTLDIR
              value: /risingwave-console-data/risectl
            - name: RCONSOLE_HELM_CHART_DIR
              value: /risingwave-console-data/helm-charts
          volumeMounts:
            - name: risingwave-console-data
              mountPath: /risingwave-console-data
  volumeClaimTemplates:
    - metadata:
        name: risingwave-console-data
      spec:
        accessModes:
          - ReadWriteOnce
        # storageClassName: standard  # Replace with your cluster's StorageClass
        resources:
          requests:
            storage: 20Gi
---
apiVersion: v1
kind: Service
metadata:
  name: risingwave-console-nodeport
  namespace: risingwave-console
spec:
  type: NodePort
  ports:
    - name: risingwave-console
      port: 8020
      targetPort: 8020
      nodePort: 30020
    - name: risingwave-console-metric
      port: 9020
      targetPort: 9020
      nodePort: 30090
  selector:
    app: risingwave-console
---
#############################################################
##
## The following part is needed to install Cert Manager and
## RisingWave Operator. If you already have them installed,
## you can skip applying the following RBAC resources.
##
#############################################################
apiVersion: rbac.authorization.k8s.io/v1
kind: ClusterRole
metadata:
  name: risingwave-console-cluster-installer
  labels:
    app.kubernetes.io/name: risingwave-console
    rconsole.risingwave.com/rbac-profile: cluster-installer
rules:
  - apiGroups: ["apiextensions.k8s.io"]
    resources:
      - customresourcedefinitions
    verbs: ["get", "list", "watch", "create", "update", "patch", "delete"]
  - apiGroups: ["rbac.authorization.k8s.io"]
    resources:
      - clusterroles
    verbs:
      [
        "get",
        "list",
        "watch",
        "create",
        "update",
        "patch",
        "delete",
        "bind",
        "escalate",
      ]
  - apiGroups: ["rbac.authorization.k8s.io"]
    resources:
      - clusterrolebindings
    verbs: ["get", "list", "watch", "create", "update", "patch", "delete"]
  - apiGroups: ["admissionregistration.k8s.io"]
    resources:
      - mutatingwebhookconfigurations
      - validatingwebhookconfigurations
    verbs: ["get", "list", "watch", "create", "update", "patch", "delete"]
  - apiGroups: ["apiregistration.k8s.io"]
    resources:
      - apiservices
    verbs: ["get", "list", "watch", "create", "update", "patch", "delete"]
  - apiGroups: [""]
    resources:
      - namespaces
    verbs: ["get", "list", "watch", "create", "update", "patch"]
  - apiGroups: [""]
    resources:
      - pods
      - services
      - endpoints
      - configmaps
      - secrets
      - serviceaccounts
      - events
    verbs: ["get", "list", "watch", "create", "update", "patch", "delete"]
  - apiGroups: [""]
    resources:
      - serviceaccounts/token
    verbs: ["create"]
  - apiGroups: ["coordination.k8s.io"]
    resources:
      - leases
    verbs: ["get", "list", "watch", "create", "update", "patch", "delete"]
  - apiGroups: ["apps"]
    resources:
      - deployments
      - replicasets
      - statefulsets
    verbs: ["get", "list", "watch", "create", "update", "patch", "delete"]
  - apiGroups: ["rbac.authorization.k8s.io"]
    resources:
      - roles
      - rolebindings
    verbs: ["get", "list", "watch", "create", "update", "patch", "delete"]
  - apiGroups: ["batch"]
    resources:
      - jobs
    verbs: ["get", "list", "watch", "create", "update", "patch", "delete"]
  - apiGroups: ["cert-manager.io"]
    resources:
      - certificates
      - certificaterequests
      - issuers
      - clusterissuers
    verbs: ["get", "list", "watch", "create", "update", "patch", "delete"]
  - apiGroups: ["networking.k8s.io"]
    resources:
      - networkpolicies
    verbs: ["get", "list", "watch", "create", "update", "patch", "delete"]
  - apiGroups: ["policy"]
    resources:
      - poddisruptionbudgets
    verbs: ["get", "list", "watch", "create", "update", "patch", "delete"]
  - apiGroups: ["monitoring.coreos.com"]
    resources:
      - podmonitors
      - servicemonitors
    verbs: ["get", "list", "watch", "create", "update", "patch", "delete"]
---
apiVersion: rbac.authorization.k8s.io/v1
kind: ClusterRoleBinding
metadata:
  name: risingwave-console-cluster-installer
  labels:
    app.kubernetes.io/name: risingwave-console
subjects:
  - kind: ServiceAccount
    name: risingwave-console
    namespace: risingwave-console
roleRef:
  kind: ClusterRole
  name: risingwave-console-cluster-installer
  apiGroup: rbac.authorization.k8s.io
kubectl apply -f risingwave-console-external-pg.yaml
Access Console
Access the UI athttp://<any-node>:30020, or replace the Service with your preferred ClusterIP, LoadBalancer, or Ingress setup.
The starter manifests include RBAC that lets Console install cert-manager, the
RisingWave Operator, and environment-scoped resources. If those components are
managed by another platform team, remove the cluster-installer RBAC and use
imported resources instead.
Binary deployment
Use the binary when you want to run Console directly on a host and manage PostgreSQL separately:RW_LICENSE_KEY_PATH=/etc/rconsole/license.jwt \
RCONSOLE_SERVER_PG_DSN="postgres://rconsole_user:rconsole_password@postgres.example:5432/rconsole" \
RCONSOLE_ROOT_PASSWORD="your_secure_password" \
./risingwave-console
Verify the installation
- Check the process or container logs.
- Open the UI:
- Docker or binary:
http://localhost:8020, unless you changed the port. - Kubernetes NodePort starter manifest:
http://<any-node>:30020.
- Docker or binary:
- Sign in as
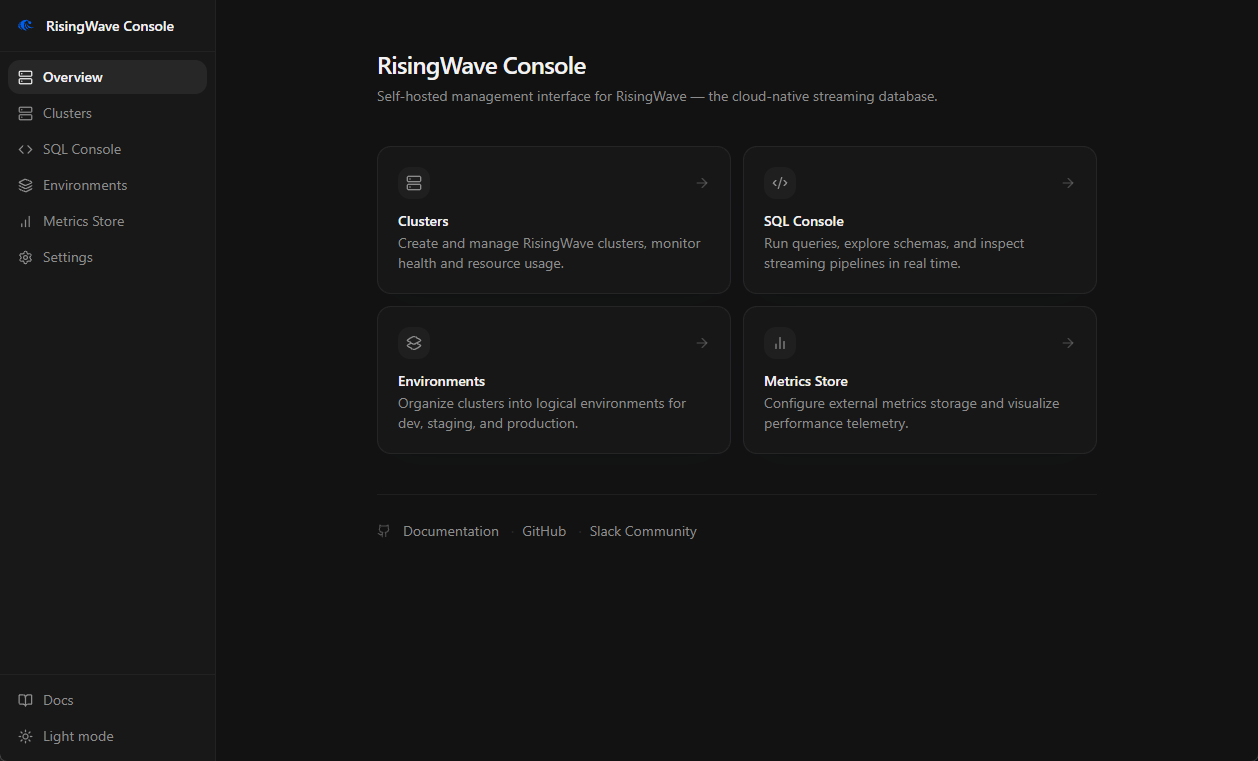
root. - Confirm that the home page loads and the sidebar shows Overview, Clusters, SQL Console, Environments, Metrics Store, SSO Connectors, Users, and Settings.
Troubleshooting startup
| Symptom | Check |
|---|---|
| Console exits with a missing license error | Set RW_LICENSE_KEY or RW_LICENSE_KEY_PATH. If using a file, confirm the path inside the container or pod. |
| Console reports that the license does not enable premium | Use a signed RisingWave license key with the premium feature enabled. |
| PostgreSQL connection fails | Verify RCONSOLE_SERVER_PG_DSN, network reachability, TLS requirements, and database user permissions. |
Port 8020 is already in use | Change the host port mapping or set RCONSOLE_SERVER_PORT. |
| Kubernetes pod starts but the UI is unreachable | Check the Service type, NodePort or Ingress configuration, and network policies. |