Once RisingWave Console is installed and running, the next step is to connect it to your existing RisingWave clusters. This allows RisingWave Console to monitor them and enables you to use features like the SQL Console and operational tools.Documentation Index
Fetch the complete documentation index at: https://docs.risingwave.com/llms.txt
Use this file to discover all available pages before exploring further.
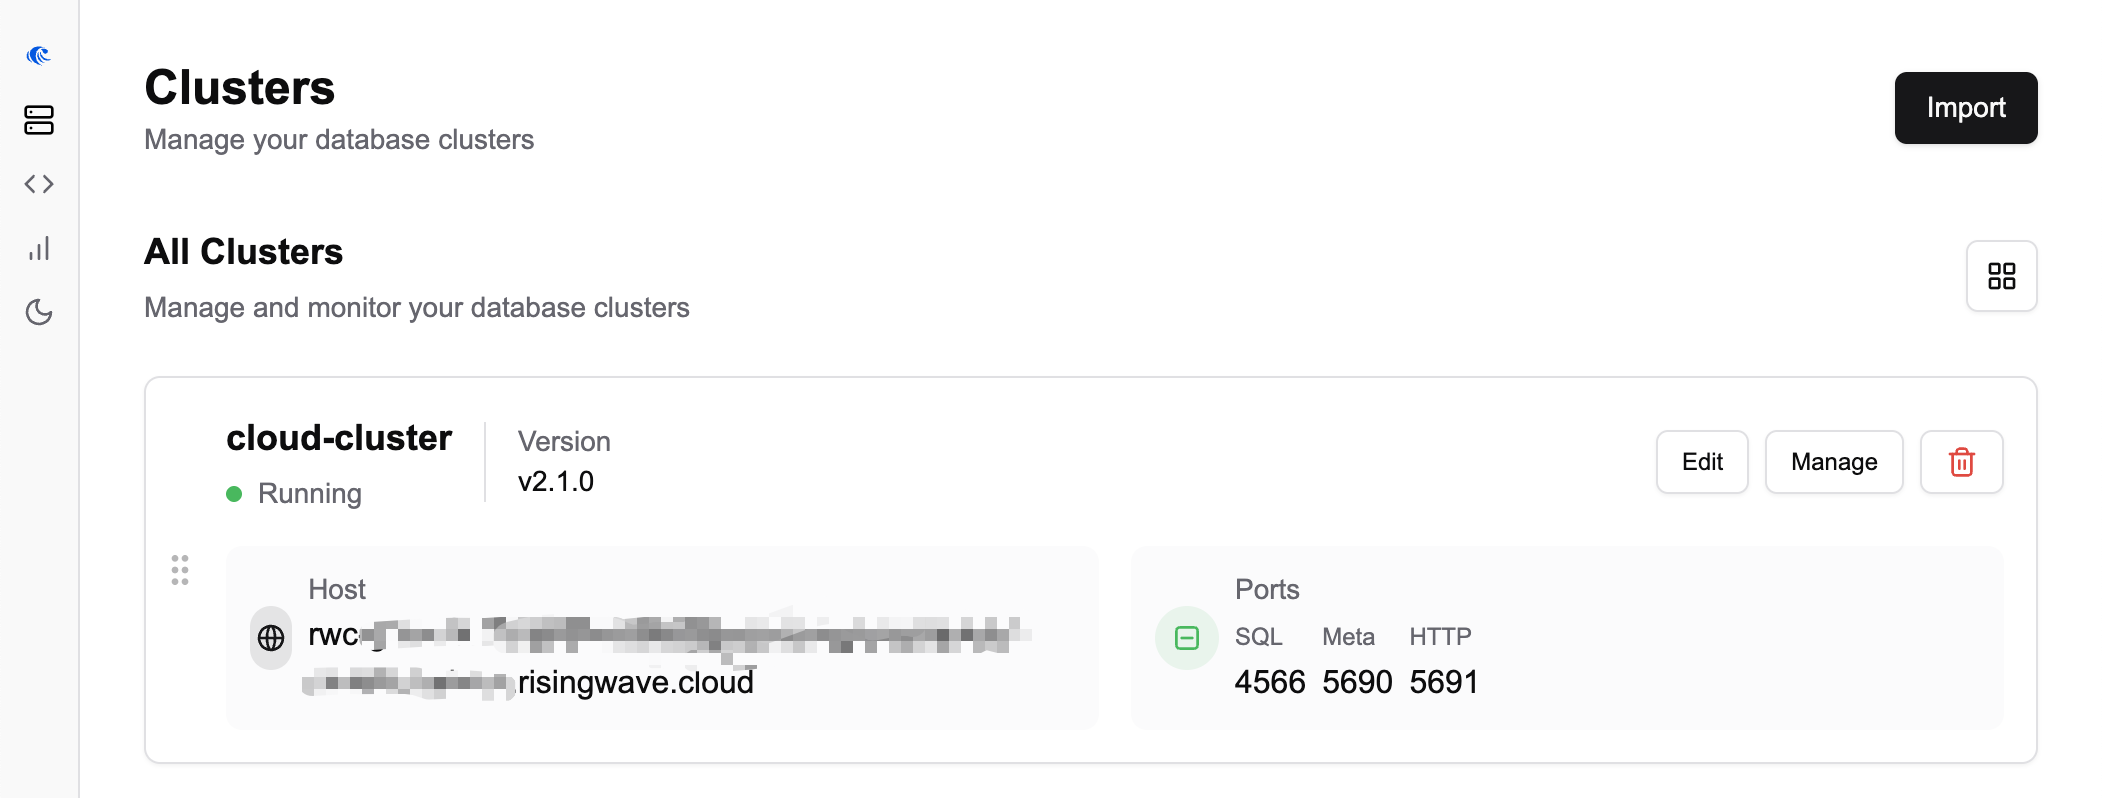
Adding a new RisingWave cluster connection
- Navigate to the clusters section: From the main RisingWave Console dashboard, click on the Clusters card or the corresponding icon in the sidebar. This will take you to the cluster management page.
- On the Clusters page, click Import. The Import New Cluster window will open.
-
Fill in the cluster details:
- Name: Provide a unique, user-friendly name for this RisingWave instance as it will appear within RisingWave Console (for example,
Production RW-East,Staging Cluster,My Local Dev RW). - Host: Enter the hostname or IP address where your RisingWave cluster’s Meta Node can be reached (for example,
risingwave.mycompany.internal,10.0.1.50, orrwc-g1hrnst114eik9vd9tkled8ght-heng-test.canary-useasfor cloud endpoints). - SQL Port: Specify the port number your RisingWave cluster uses for SQL client connections. The default is typically
4566. - Meta Node Port: Enter the port number for RisingWave’s Meta Node service. The default is usually
5690. RisingWave Console uses this to gather cluster metadata and status. - HTTP Port: Input the port number for RisingWave’s Meta Node HTTP service, which often serves Prometheus metrics and other API endpoints. The default is typically
5691. - Metrics Store: Select how RisingWave Console should handle metrics for this cluster.
- None: If selected, RisingWave Console will perform basic status checks but may not display detailed performance metrics charts. (Future options might include integration with Prometheus, etc.)
- Version: Choose the version of your RisingWave cluster from the dropdown list (for example,
v2.1.0). This helps RisingWave Console tailor its interactions.
- Name: Provide a unique, user-friendly name for this RisingWave instance as it will appear within RisingWave Console (for example,
-
Test the connection: Click the Test Connection button. RisingWave Console will attempt to connect to your RisingWave cluster using the details provided.
- If successful, you should see a confirmation message.
- If it fails, double-check all entered details, ensure your RisingWave cluster is running and accessible from the RisingWave Console server over the network (including any firewalls), and verify the ports are correct.
- Save the cluster connection: If the connection test is successful, click Create Cluster.
Editing an existing cluster connection
If you need to update the details for a previously added cluster (for example, if the host or port changes):- Navigate to the Clusters page.
- Locate the cluster you wish to edit in the list.
- Click the Edit button associated with that cluster.
- The Edit Cluster window will appear, pre-filled with the current settings.
- Modify the necessary details.
- It’s recommended to use the Test Connection button again after making changes.
- Click Save Changes to apply your updates.
Deleting a cluster connection from RisingWave Console
To remove a RisingWave cluster connection from RisingWave Console:- Navigate to the Clusters page.
- Locate the cluster you wish to remove.
- Click the Delete icon associated with that cluster.
- Confirm the deletion when prompted.
Deleting a cluster connection from RisingWave Console only removes its configuration from RisingWave Console. It does not affect, stop, or delete your actual RisingWave cluster.